Enjoy Free Shipping Over $50
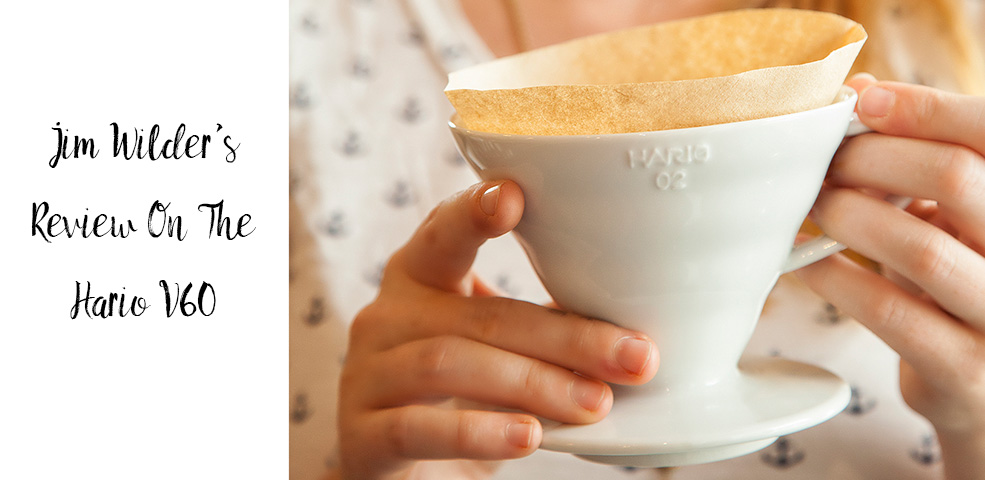
Staff Favorite: Hario V60
My alarm goes off. I get out of bed. What’s my first thought? Oh yes, start boiling water so I can brew my morning coffee. That’s how I start most days, making a delicious cup of coffee with my Hario V60.
In my mind, there’s no better way to brew a single cup of coffee than by the Hario V60. It’s fast, consistent, and super easy to clean. Filters cost pennies, and I control how the coffee is brewed, not a machine. Once the basics are thoroughly learned, there’s a lot of fun and discovery in creating your own favorite recipe, too.
Before we brew, let’s get some fundamentals out of the way. First, you’ll need fresh, freshly ground coffee. If you don’t own a burr grinder, please buy one! Even a $40 burr grinder is the simplest way to dramatically increase the quality of your coffee at home. Select freshly roasted coffee, ideally within two weeks of the roast date (side note, if a bag of coffee doesn’t have a roast date on it, I won’t drink it).
Second, invest in a digital scale that measures to the tenth of a gram. Weighing is much more accurate than measuring coffee by the scoop or water by the ounce. Amavida sells the scale I use at home for $29.95+tax. Other helpful items are a digital thermometer, calculator (if needed for different ratios or starting weights) and a timer or watch (I use my iPhone for both the calculator and timer).
Now, it’s time to brew, using my preferred recipe. Start by boiling water (ideally about twice as much as you need for brewing, in this case about 768g), then weigh out 24g of coffee. I prefer a 1:16 (1g coffee : 16g water) ratio when starting a new coffee, but I’ll discuss other recipes below. Set up your V60 with a filter and place it onto your brewing vessel (BV) or mug.
Once the water has boiled, pre-rinse your filter with about 1/3 of your water. This cleanses the paper filter of any papery taste that would otherwise go into your cup. Once the water has filtered through (and preheated your V60 and BV), dispose of this water.
Now, grind your coffee on a fine setting, shooting for about the size of grains of sand. Place your V60, BV onto your scale and tare the scale. Add your ground coffee; it should be 24g. Now comes the fun part.
Start pouring water (ideally 196-200 degrees, if you have a thermometer; alternatively let the water cool for about five minutes off the boil) in the center of the grounds, slowly pouring in circles to the outer edge of the grounds. The goal here is to wet all the grounds in about 15-20 seconds using only 48g of water (twice the ground coffee weight). Once the brew has had time to bloom (about 45 seconds in), add another 77g of water. At the 1:30 mark add 125g more water. And finally at 2:15 add the remaining 134g of water. By around 2:30 you should have 384g of water in the grounds. The brew should finish (signified by the steady stream of brewed coffee changing to dripping) ideally around 3:00-3:30. Now just discard the filter and grounds, give the cup a quick stir and enjoy your coffee!
Materials:
– V60 and filters
– Burr grinder (highly recommended!)
– Coffee: roasted within two weeks is ideal
– Digital scale
– Kettle
– Brewing vessel or a 12 oz. or larger mug
– Timer/watch
– Thermometer (optional, and digital is preferred)
Jim’s Brewing:
– 48g over 15-20s, then wait 25-30 seconds
– At 0:45 in, add 77g (125 total water)
– At 1:30 in, add 125g (250g total water)
– At 2:15 in, add 134g (384g total water)
– Once the coffee is dripping and not a steady stream, dispose of filter and grounds, and enjoy!
BB Variation (30:350):
– 50g over 15 seconds
– At 0:45 in, add 100g (150g total water)
– At 1:30 in, add 100g (250g total water)
– At 2:15 in, add 100g (350g total water)
– I use this variation for darker roasted coffees. It helps to reduce the amount of “roast” that makes it to the cup.